
· Dana Whitfield
How to Finish a Weaving and Tie Off the Warp
Most weaving tutorials end in the same place: a few rows in, rhythm established, and now just keep going. Then you reach the top of your warp, holding a panel of fabric trapped inside a wooden frame with no idea how to free it without the whole thing coming apart.
That gap shows in our own buyer feedback. A verified buyer in New Zealand wrote: "There are no instructions to put it together but I'm sure I'll find a YouTube video about how to do this and how to thread it up." Another, in Portugal: "The instructions are missing." So this guide assumes your piece is already woven. Assembly, warping and the shuttle motion live in our step by step guide, and none of it is repeated here.
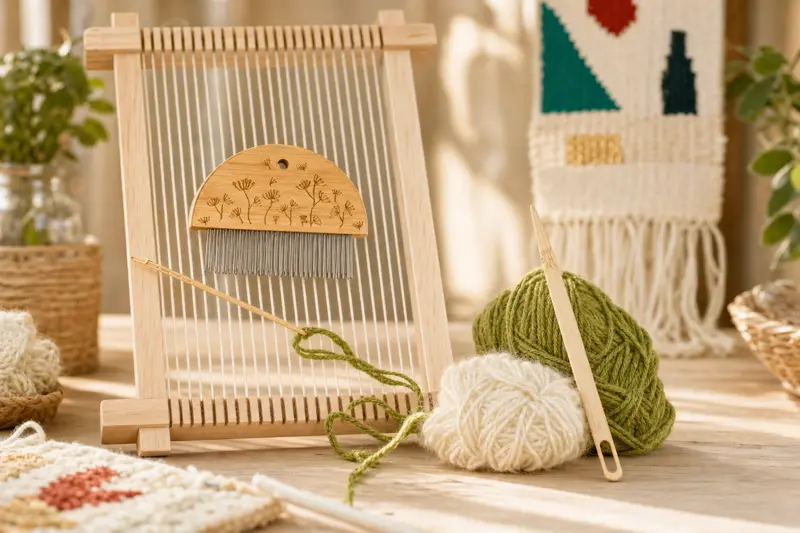
How do you know a weaving is actually finished?
This is the decision people get wrong, and it is unfixable afterwards. The temptation on a first project is to weave until you run out of room. Then the comb no longer fits between the last row and the top bar, every warp thread ends flush against the wood, and your only options are unpicking rows or accepting a raw edge. Plan the top edge before your first row instead.
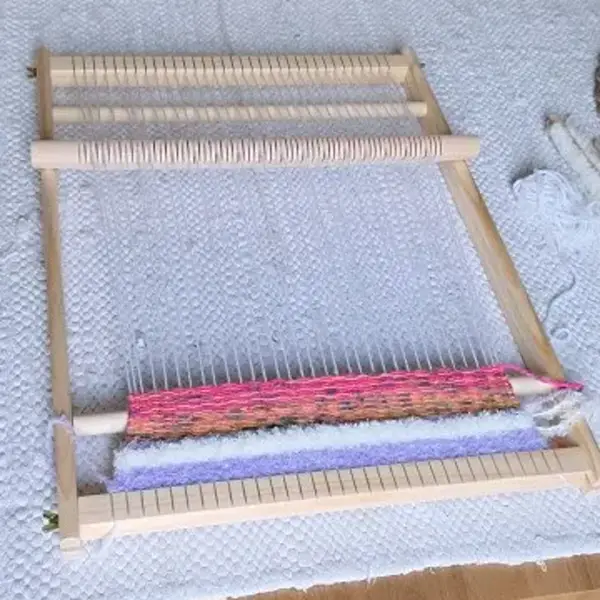
Bare warp still above the fabric. Verified buyer photo.
Pack the last rows tighter than the rest
The reason is tension. Your fabric is held in shape by warp pulled taut between two bars, and the moment you cut, that force disappears. Rows in the middle have fabric above and below holding them; the top and bottom rows have fabric on one side only, which is why they open first.
General beating pressure and pacing belong to our how to use a weaving loom guide. The point here is narrower: use more pressure than usual for the last three or four rows, and check that no warp shows through before you put the comb down.
What our own beating test implies here: Dana wove matched swatches at three beating frequencies, and the every-third-row swatch still showed visible warp lines once complete (full results in our tapestry weaving basics guide). We have not run a separate finishing test and will not invent one, but the logic carries: loosely beaten rows open first, and the top row has nothing above it.
Hemstitch on the loom, before anything gets cut
Thread a blunt needle with a long piece of the yarn you wove with. Take it down through the fabric two or three rows below your last row, bring it back up, and draw the loop around a group of two to four warp threads so it cinches them against the weaving. Repeat across the width. Each stitch locks a bundle of warp against the last row of weft so it cannot slide.
Do the bottom edge as well, ideally right after your first few rows while the fabric is still low on the frame. Hemstitch both ends on the loom and the piece stays square when the tension goes.
One honest note on tools: none of our kits include a needle, so a blunt tapestry needle is the one extra thing worth owning before you finish a piece. We would rather say so than let you find out mid-project. Kit contents by size are on our weaving loom kit page.
How to tie off the warp so the edge holds
A square knot is left over right, then right over left. That second reversal is the point: tie both halves the same way and you have a granny knot, which sits crooked and works loose over months of hanging. Before pulling each knot tight, slide it down against the last row of weft. Slack left there becomes a visible gap later.
Keep the pressure consistent across the width. Knot the outer pairs harder than the central ones and the finished edge curves, because you have shortened the sides. If your knots tighten unevenly, redo the ones behind you rather than hoping it averages out.
Cutting your weaving off the frame
Because the warp is wound in one continuous line between the notches, every thread you see is half of a loop turning around a bar. Lift those loops off intact and they slide straight onto a dowel for hanging. Cut through them and each loop becomes two tails.
Cut a small section at a time with sharp scissors, keeping the piece flat rather than hanging from the threads you have not reached. Work from one side to the other so the remaining warp keeps its tension. Retie any loose knot now, while it is easy to reach.
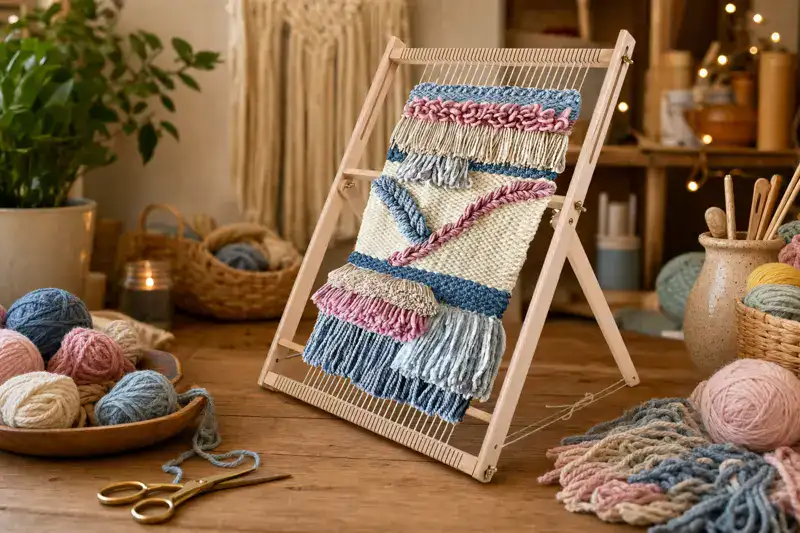
Fringe, twisted tassels, or a folded hem
| Finish | What it needs | Best for |
|---|---|---|
| Loose fringe | Knotted pairs, trimmed level with scissors | Wall hangings, first projects, anything rustic |
| Twisted tassels | Noticeably longer tails, since twisting shortens them | Pieces that hang free and would otherwise tangle |
| Folded hem | Short tails, a needle, and thin enough fabric to fold | Coasters, mug rugs, mats that lie flat |
Our tapestry weaving basics guide already covers loose versus braided fringe, so here is the mechanics. To twist a tassel, split a knotted group in half, twist each half the same direction until it wants to kink, then let the halves wrap around each other the opposite way and knot the end. The counter-twist holds it. A hem works the other way: trim the tails short, fold the last centimetre of fabric to the back and stitch it down, which suits a thin weave only.
Weaving in the loose weft tails
Follow the weave rather than cut across it: retrace the same over-under sequence its own row used, for three or four warp threads, then cut close to the surface. The tail vanishes into fabric that is already dense, one more reason the packing work matters. Do as many as you can while the piece is still under tension.
What changes when you finish a large weaving
The technique does not change with size. What changes is how much of it there is, and how visible a small inconsistency becomes. A wobble of a couple of millimetres in knot tension is invisible across the Small frame. Across the Large, it reads as a curved bottom edge from the other side of the room.
Two habits help. Knot from the centre outwards in both directions rather than left to right, so any drift is mirrored instead of piling up at one end, and finish a wide edge in one sitting, because hand pressure changes between sessions. The notched rod in the Large kit earns its place during warping for the same reason: evenly spaced warp gives evenly sized groups to knot. Still choosing a size? Our beginners guide argues for starting narrower.
Verified buyers who rate this loom five stars; the most common complaint in the same corpus is missing instructions, which is why guides like this one exist
— LoomCraft verified review breakdown, 2026
of U.S. adults now identify as crafters, part of the demand keeping simple hand looms in circulation
How far back Coptic Egyptian tapestry-weave textile fragments in the Met's collection date, woven with the same weft-faced logic taught on a hand loom today
— Metropolitan Museum of Art collection records, 2024
Frequently asked
Do I have to hemstitch, or can I just tie knots?
Knots alone will hold a small piece, and plenty of weavers finish that way. Hemstitching binds each group of warp threads to the fabric itself, so the last row cannot slide away from the knot later. On anything you plan to hang, it is worth the time.
My kit did not come with a needle. What can I use instead?
No LoomCraft kit includes a needle. Small and Medium ship with the frame, a comb, two forked shuttles and the 12-color yarn set; Large adds a third shuttle and a notched rod. A blunt tapestry needle is the one extra tool worth buying, since a shuttle is far too wide to pull tails through dense fabric.
How much bare warp should I leave for fringe?
Roughly a hand span above your last row and the same below it, more for twisted tassels, since twisting eats length. Decide before you weave, because you cannot add warp back later.
Can I re-warp the loom straight after cutting a piece off?
Yes. Once the piece is free, check that the corner wing nuts are still hand tight and the frame is ready to warp again the same evening.

Dana Whitfield · Textile Craft Curator, LoomCraft
Dana test-weaves every LoomCraft size on real tapestry projects, timing setup, checking warp tension, and how the notched bars hold up.
Reviewed and updated July 27, 2026. See how we test, or the terminology in our frame loom guide.
Related reading: How to use a weaving loom · Tapestry weaving basics · Weaving loom for beginners · Reviews · All guides
Frame, comb, two shuttles and 12 yarn colours included. Arrives in 8 to 10 business days.